Tuesday, October 18, 2011
Fall is almost here
It never fails. October arrives where I live and things cool off....for a few days...before it goes back to 90 degrees Fahrenheit. I start to pull out jackets and my hand knit scarves only to return them to the closet a few days later. This little hint of Fall, however, stirs my urge to knit. I hopped on Ravelry the other day and found 4000 Ravelers on-line! I am apparently not the only one who gets the urge to knit when Fall arrives. So if there is a nip in the air where you live, whether the nip lasts a few days or you are already preparing for snow, grab those knitting needles and find a fun project. Knitting season is here!
Saturday, October 15, 2011
Doll Hair Instructions
To create hair on knit doll, here is my recommend method.
Step 1: Pick yarn of your choice and wrap around a paperback book. Make sure the hair will be long enough to cover the head. To ensure head coverage the length of one full circle of the wrap must reach from chin to chin. By this I mean the length of the yarn wrapped once around the book must be at least long enough to go from one side of the doll's chin, over the head and to the other side of the doll's chin. If you want the doll to have long hair I suggest shoulder to shoulder.
Wrap the yarn around the book until the wrapped hair equals the distance from the doll's forehead to the nape of her neck. You want to have enough hair to cover the head from the forehead, over the top of the head and down the back of the head.


Step 4: Place hair on the dolls head. Stitch down the part and attach to the sides of the head. Use the same yarn you used for the hair and it will blend right in. Tack down the hair on the sides and back of the head.

 Happy Hair Making!
Step 1: Pick yarn of your choice and wrap around a paperback book. Make sure the hair will be long enough to cover the head. To ensure head coverage the length of one full circle of the wrap must reach from chin to chin. By this I mean the length of the yarn wrapped once around the book must be at least long enough to go from one side of the doll's chin, over the head and to the other side of the doll's chin. If you want the doll to have long hair I suggest shoulder to shoulder.
Wrap the yarn around the book until the wrapped hair equals the distance from the doll's forehead to the nape of her neck. You want to have enough hair to cover the head from the forehead, over the top of the head and down the back of the head.

Step 2: Run a piece of scotch tape down the center of the wrapped yarn...horizontally based on the photo above. Then turn the book over and cut the yarn down the middle of the book. This will leave you with many individually cut pieces of hair held in place only by a piece of scotch tape.

Step 3: I recommend using a sewing machine for this task, but it can be done by hand...sew the hair together by sewing down the middle of the tape. Make sure the sticky side of the tape is down or it will stick on the sewing machine needle. Use thread a similar color to the hair to help it blend. The stitching gives your doll's hair a part of sorts. Step 4: Place hair on the dolls head. Stitch down the part and attach to the sides of the head. Use the same yarn you used for the hair and it will blend right in. Tack down the hair on the sides and back of the head.
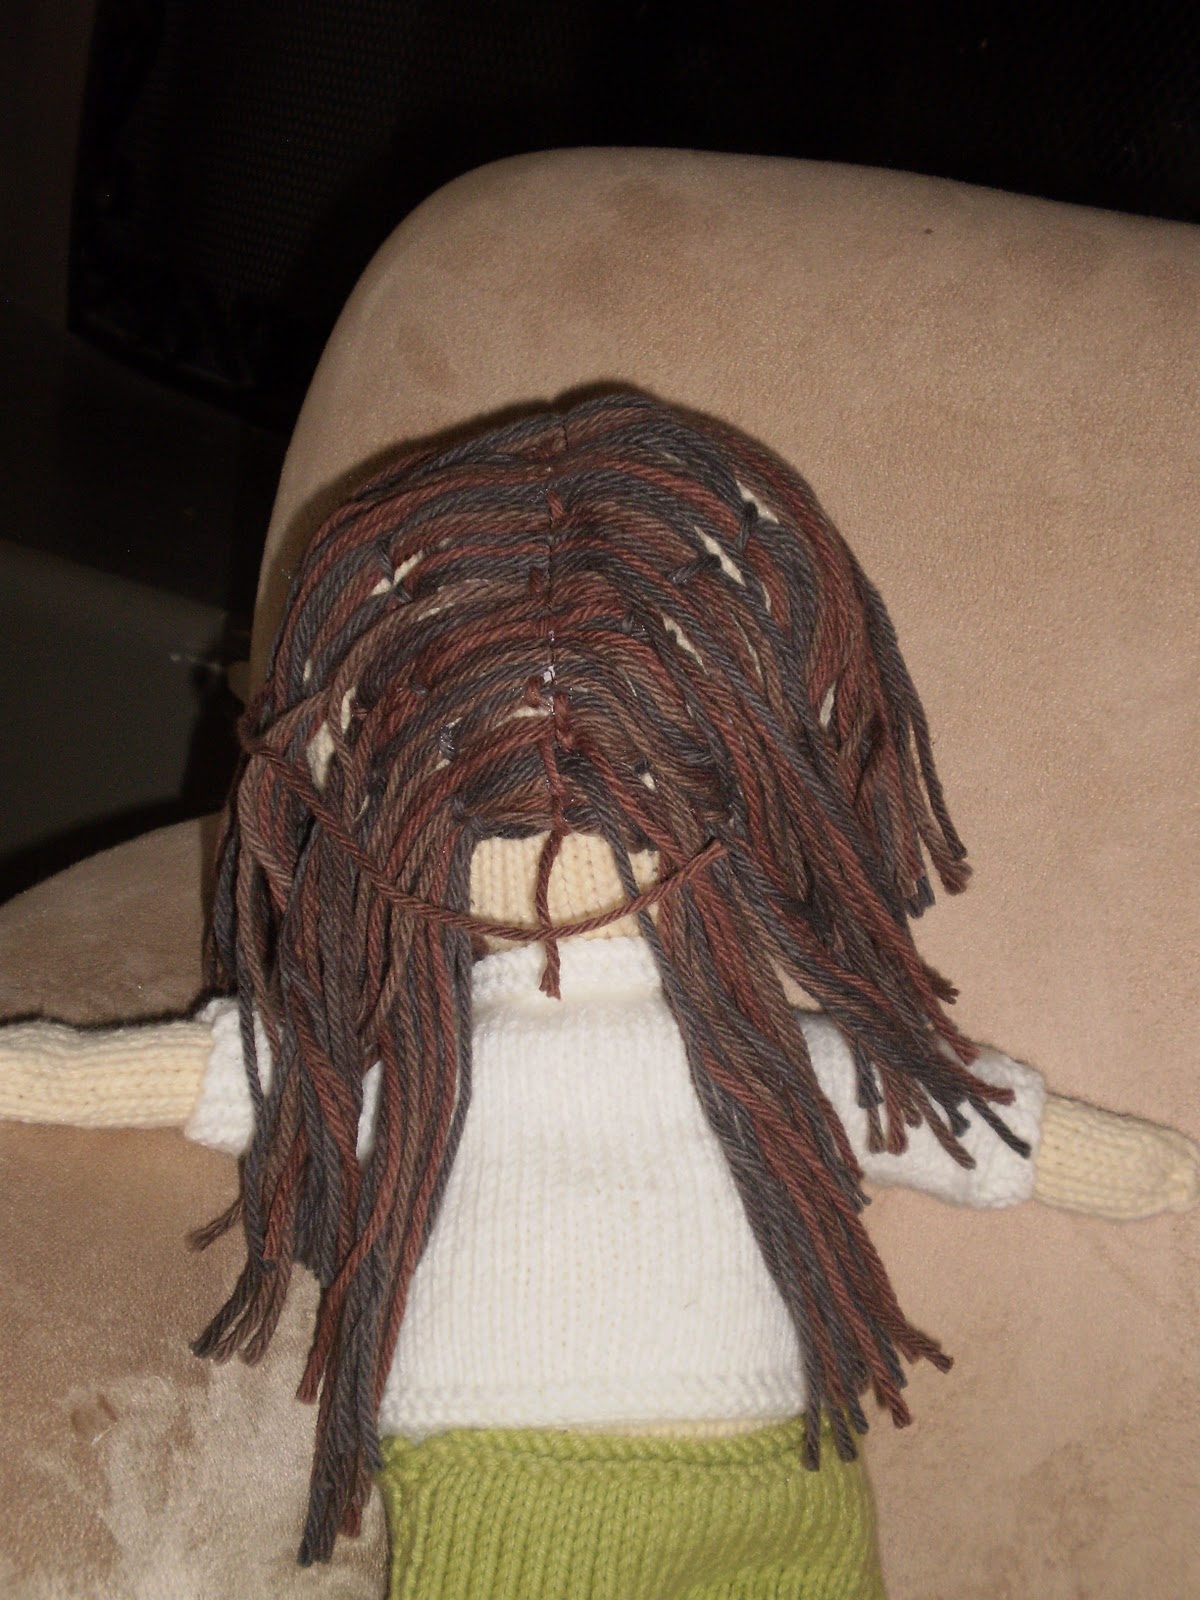
Step 5: Repeat the yarn wrapping process around a book, tape down the middle, cut it in half opposite the tape and stitch it together. Place the second layer of hair on the head and stitch in place at the part and as needed around the head.
Step 6: Cut the hair and style. For one doll I simply did a ponytail, and if you aren't good at hair styling I found this to be a very forgiving hair style.
 Happy Hair Making!
Friday, October 14, 2011
Doll Hair
Doll Hair. This was a bit of a daunting task for me. If you are new to my blog, I recently completed a pattern for a doll, MaryJayne. The pattern is available under the dolls tab. As I created my doll pattern I experimented a bit with hair placement after researching a bit on line, but many of my dolls remained bald as I tried to find the right method for creating the perfect hair piece.

I eventually found a blog with instructions and photos of the desired look I hoped for in my doll hair. The Waldorf Doll Hair Tutorial (http://starrysheep.com/crafty/?p=103) saved poor MaryJayne from a life of bad hair days. I'm not saying I have mastered any of the techniques necessary for doll hair, but I learned enough through trial and error to produce a couple of cute dos if I do say so myself.


I eventually found a blog with instructions and photos of the desired look I hoped for in my doll hair. The Waldorf Doll Hair Tutorial (http://starrysheep.com/crafty/?p=103) saved poor MaryJayne from a life of bad hair days. I'm not saying I have mastered any of the techniques necessary for doll hair, but I learned enough through trial and error to produce a couple of cute dos if I do say so myself.


The method I opted for as outlined in the blog mentioned above didn't require that I stitch row after row of hair across the back of the head to keep the doll's head from being bald. (I did try that method and found it very time consuming and the poor doll's head was so heavy with so much hair it sagged.) Some of the methods I couldn't even follow. My method of choice required that I simply stitched down layer one and then added a top layer to create the "style." Tomorrow I will have step-by-step instructions on the technique.
Wednesday, October 12, 2011
Designing One Pattern Leads to Another
While working on MaryJayne, (I promise to discuss something other than MaryJayne before Christmas) I had a wonderful time designing her clothes. As her inspiration was my two grandmothers and one is very fashionable, it makes sense that her clothes were an important aspect of the design. My first "dress" I simply cast-on and started to knit. I had no idea what type of clothing I was designing for this poor little doll. It turned into a coat very quickly. As I knit I developed MaryJayne's swing coat. (The pattern will be out in the next month or so for the coat.) The coat grew from a few garter stitch rows to include bell arms and quite a flare in the body. I love the coat so much, as do others who have seen it, that I have decided to write the pattern for the MaryJayne's Swing Coat for children and adults too. I guess knitting the coat for the doll didn't lead to an entirely new pattern, but it lead to a new idea...designing the outfit for life sized people. I just love how knitting opens doors you don't expect when you cast on....
Monday, October 10, 2011
Knitting in the round or with a seam?
While working on the MaryJayne pattern, see Dolls tab for information on purchasing the MaryJayne pattern, I tried to knit the arms and legs of the doll both flat and in the round. When I first started knitting anything knit in the round scared me...and as my previous blog post discusses, knitting with double pointed needles simply takes practice. As I tried both, however, I found the seam up the side or back of the arms just didn't look right. On the legs I preferred not to have the seam (this may be due in part to my poor seaming skills, too), but the seam up the back didn't bother me too much. Therefore, the MaryJayne pattern requires that the arms be knit in the round and the legs can be done either way. My final determination simply came down to whether or not the seam bothered me. I would love to know your thoughts on knitting the round versus seaming.
Tuesday, October 4, 2011
How to use the Checklist
I introduced with the MaryJayne pattern a little cheat sheet if you will, that I have been creating and using myself with patterns. I often find I am either marking all over a pattern or keeping a piece of scrap paper with notes on the steps I have completed, unless I create one of these nifty little checklists. The checklist is not the pattern, it is simply an abbreivated list of instructions with a place to check off the row or round after completed or tally up K12 rows....in case someone calls you and you come back to find you can't remember if you were on row 5 or 7.
My abbreviated instructions may not make sense to everyone, and I encourage you to write in your own little notes. Hopefully, however, it will help you keep track of where you are in the pattern. If you have any questions on the checklist, please let me know.
My abbreviated instructions may not make sense to everyone, and I encourage you to write in your own little notes. Hopefully, however, it will help you keep track of where you are in the pattern. If you have any questions on the checklist, please let me know.
Sunday, October 2, 2011
Using Double Pointed Needles
If you are like me, the thought of using double pointed needles scared me a bit at first. After a few projects I became more comfortable with them, and now I often prefer them to joined/connected needles because it allows the size of my project to change in circumfrance greatly as I knit. The best tip I found on using double needles is simply to practice. Do be careful not to lose your knitting off one end or the other. (Those little tip guards can be a lifesaver if you have to put down your project.) When using markers make sure they are not located at the end of a needle or they will fall off. And again, practice. If you learn to use them a whole new world of patterns will open up to you.
Subscribe to:
Posts (Atom)